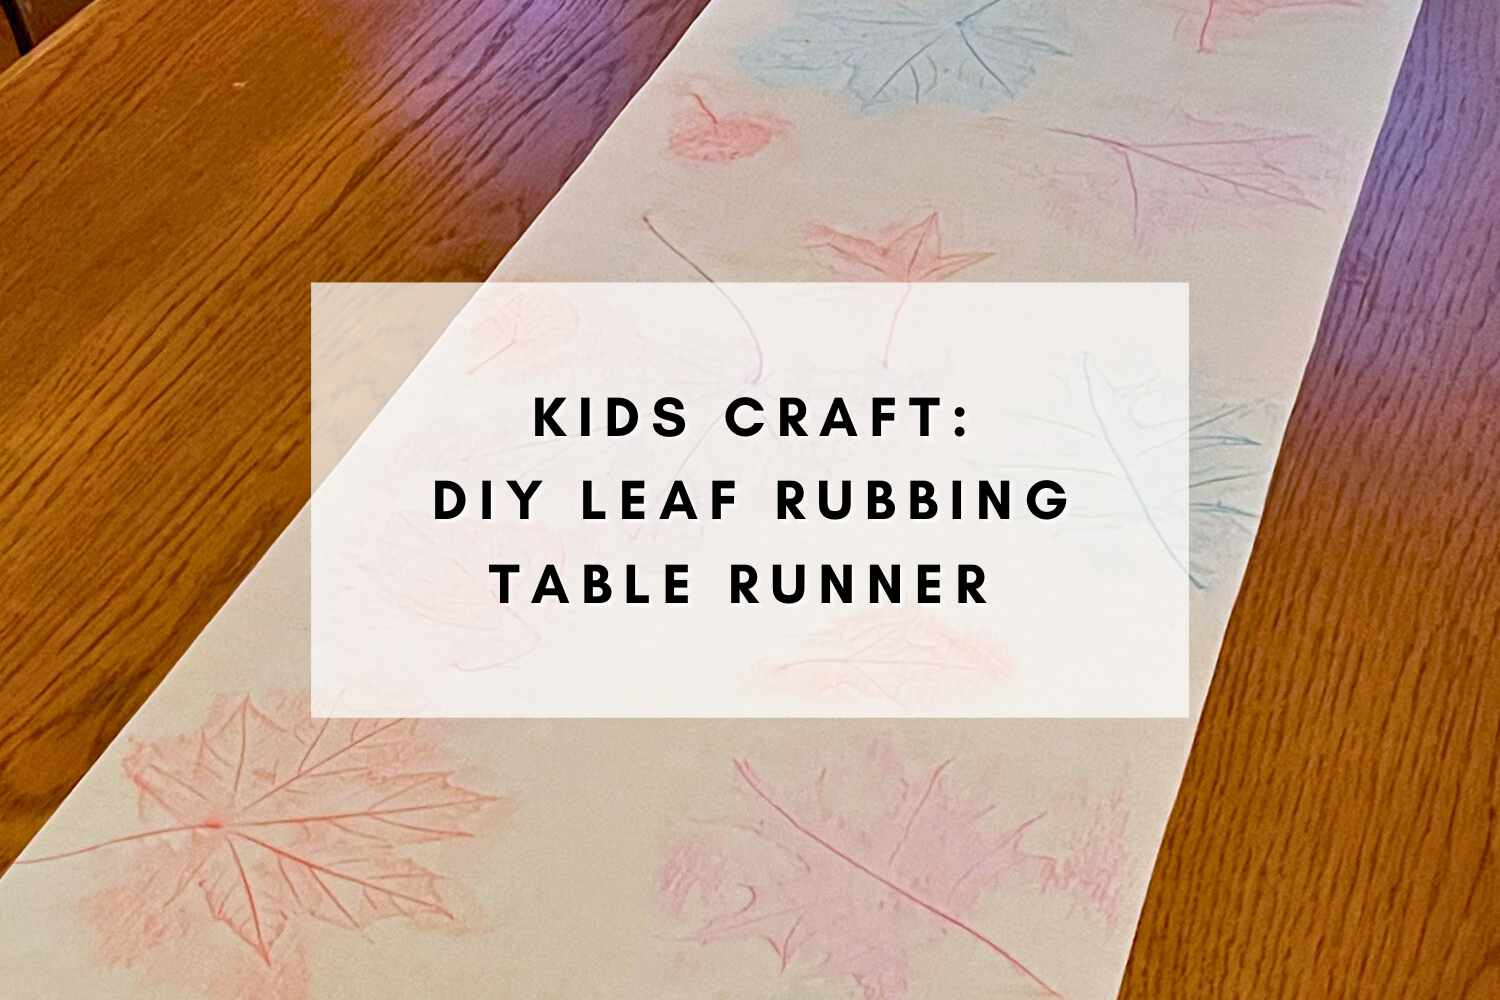
Thanksgiving is a time for gratitude, family, and, of course, creativity. Engage the little ones in a nature-inspired craft activity by creating a DIY leaf rubbing table runner.
This hands-on project not only adds a personalized touch to your Thanksgiving table (or the kids’ table!) but also encourages kids to explore the beauty of fall leaves.

In this blog post, we’ll guide you through the steps of creating a charming leaf rubbing table runner that can be used as a sentimental centerpiece for your holiday feast.
Materials Needed:
Craft Paper or Butcher Paper: Choose a roll of craft paper or butcher paper to create the base for your table runner. Ensure it’s long enough to span your entire dining table.
Fall Leaves: Collect a variety of fall leaves in different shapes and sizes. Choose leaves with interesting textures and veins for a more intricate rubbing.
Crayons: Select a range of crayon colors to add vibrancy to your leaf rubbings. Metallic or warm autumn hues work exceptionally well.
Masking Tape: Use masking tape to secure the craft paper to the table, preventing it from moving during the rubbing process.
Scissors: Have a pair of scissors on hand to trim the table runner to the desired length.
Step-by-Step Guide to DIY Leaf Rubbing Table Runner:

Step 1: Collect Fall Leaves
Head outdoors with the kids to gather an assortment of fall leaves. Encourage them to select leaves with unique shapes and textures, as these will make the most interesting rubbings.
Step 3: Arrange the Leaves
Place the leaves on the table in a decorative pattern. You can create a border along the edges or scatter them randomly. Place the leaves smooth side down so the most detailed pattern will come through.
Consider using press n seal plastic wrap to keep leaves securely on the table so they don’t move once you start coloring.


Step 3: Prepare the Craft Paper
Unroll a length of craft paper onto your dining table over the leaves and press n seal. Use masking tape to secure the paper in place on the ends, ensuring it lies flat and doesn’t shift during the crafting process.
Step 4: Create Leaf Rubbings
- Peel Crayons: Unwrap the crayons and remove any paper covering.
- Place Paper Over Leaves: Lay the craft paper over the leaves and tape the sides to the table.
- Rub with Crayons: Encourage the kids to gently rub the crayon over the paper, directly above the leaves. The leaf shapes and textures will begin to appear on the craft paper.

Step 5: Experiment with Colors
Let the kids experiment with different crayon colors and techniques. They can layer colors, blend shades, or even create a gradient effect for a more artistic touch.
Step 6: Trim to Size
Once the kids have finished their leaf rubbings and are satisfied with the design, carefully trim the table runner to the desired length. You can cut it to fit the entire table or create individual placemats for each guest.
Step 7: Set the Thanksgiving Table
Place your DIY leaf rubbing table runner on the Thanksgiving table, allowing the vibrant leaf patterns to serve as a beautiful backdrop for your holiday feast.

Tips for a Successful Project:
- Leaf Selection: Choose a variety of leaves, including maple, oak, and birch, to add diversity to your rubbing patterns.
- Color Blending: Experiment with blending crayon colors to create unique and vibrant leaf rubbings.
- Leaf Identification: Take a moment to discuss the types of leaves you’ve collected, turning the activity into an educational experience.
My kids loved this craft so much they even repeated the process with the trimmings from the original.


This DIY leaf rubbing table runner not only captures the essence of fall but also transforms your Thanksgiving table into a canvas of creativity.
As the family gathers around to give thanks, they’ll be greeted by the natural beauty and heartfelt efforts of the little ones.
This hands-on project is not just a craft; it’s a shared experience that adds a touch of warmth and personalization to your Thanksgiving celebration. Happy crafting and Happy Thanksgiving!